Wednesday, 29 June 2011

TUTORIAL 2 (Layer Basic)


STEPS:
1. After that i arrange all the background images together by using edit transform.
2 .Put 3 image in tutorial 1 to the file>save 


STEPS :
1. Blue sky background
file>open>move tool>drag>edit>free transform (change size while pressing shift)>change opacity 80%
2. MMU logo
file>open>move tool>drag>edit>free transform (change size while pressing shift)>change opacity 33%
3. Globe bakground
file>open>move tool>drag>edit>free transform (change size while pressing shift)>change opacity 66%


This is all the background images that will be use for my e-wallpaper.
-sky blue
-globe
-MMU logo

Thursday, 23 June 2011

TUTORIAL 1 (Selection Tool)

This is my complete picture for image poster using selection tool that we taught in class. Maybe i still didn't do well but thanks Madam Lydia for teaching me how to use this tools. I'll try to improve my skill in selection tools


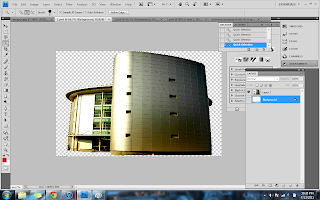
Building
file>open>quick selection tool>click object until it covering all the object that needs to crop
edit>copy>open new file>paste>save as


FOM board
file>open>quick selection tool>click object until it covering all the object that needs to crop
edit>copy>open new file>paste>save as


FOM building
file>open>quick selection tool>click object until it covering all the object that needs to crop
edit>copy>open new file>paste>save as